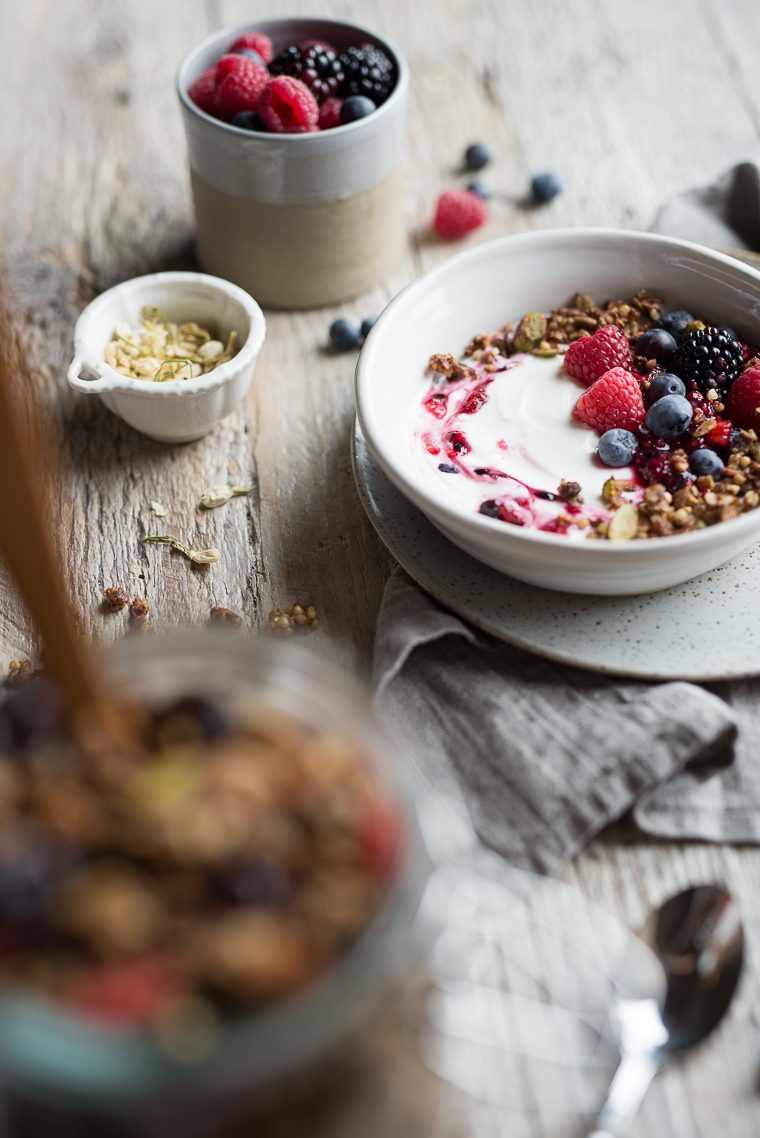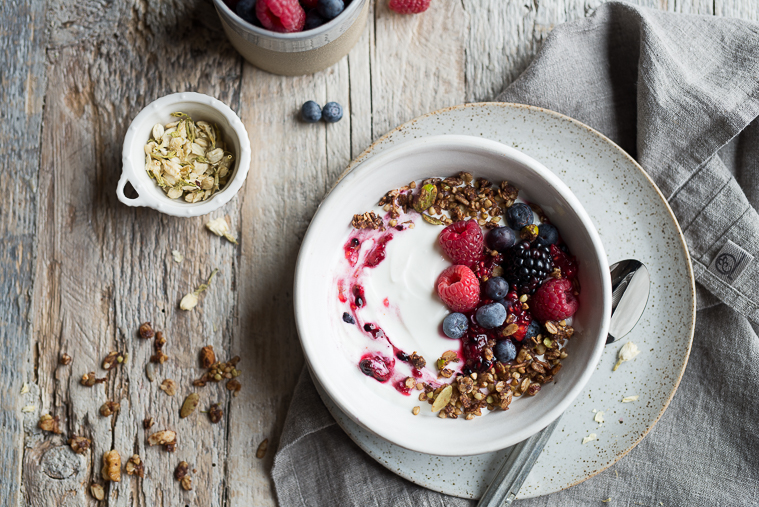
Chocolate Hazelnut & Banana Granola

“I am Ready”

“Little one, I am ready to meet you when you are ready to enter this world.  I am ready to count your little fingers and toes and watch your chest move up and down as you take your first breaths of life.  I am ready to watch a father be born and for your dad to look at his son for the first time……..I am ready when you are little one.”

These were a few of the lines of a poem I wrote for Knox just hours before I went into labour.  I had just returned home from my Blessing Way that Sunday afternoon and was flying high on emotions and inspiration from the day.  I felt grateful for such a strong support network of girlfriends and their words of strength and encouragement lifted me to a whole new level of excitement for the upcoming birth of my baby boy.  If you are unfamiliar with what a blessing way is, it’s a gathering of female friends, mothers and singles, that pass on their words of wisdom, strength, and encouragement for your labor and delivery.  At my Blessing Way, we had each girl bring a bead and the plan was that I would string them together to make a bracelet to wear during the labour to remind me of their love and support.  Each girl also wrote a little note or words of affirmation and read it to me aloud.  Needless to say, there were many tears of joy and gratitude that afternoon!

As I laid down to go to sleep that night, I wrote a little “poem” for Knox (I’m not the best writer, so it was more like a letter, but same thing!).  It spoke about how excited we were to meet him and how I knew him and I were ready for this adventure called labour and birth.  Seriously, 3 hours later, I went into labour!  Its so true what they say: Your life changes in an instant and even though scary and unpredictable, it’s the most beautiful change you have every experienced.

Our first days seem to go like this: after a night of feedings finally wake up with Knox, change him, feed him, “play” with him for an hour, put him down for a nap, take a shower, eat something…oh wow its almost noon already and now I need a nap!  My newly cleaned hair with baby spit up in it is no longer a worry; his sweet smile is all I need to make the day the best day yet.  

I was lucky to have friends and family bring over generous amounts of food for the freezer before Knox was born, however, I have still been itching to get back into the kitchen.  Its my one “release”: some me time with a bit of Vance Joy playing in the background and a bottle of Napa’s pinot that we had been saving for after the birth.  With time a bit limited now, my culinary experiments are taking a backseat, but I have still found time to whip up my favourite kale and lentil salad with black sesame dressing and this crunchy and sweet hazelnut chocolate buckwheat granola. 

 chocolate hazelnut banana buckwheat granola cereal

chocolate hazelnut banana buckwheat granola cereal

chocolate hazelnut banana buckwheat granola cereal Being a health nut, its surprising I have never posted a recipe for granola before! Its even more surprising that I have never even tried using buckwheat! Since diving into this grain with such enthusiasm, I don’t think I will be leaving it in the back of the pantry ever again! Not really knowing where I was going with the recipe, I began with the basics: oats,  nuts, seeds, then began to think what would make this granola stellar! Chocolate of course! Playing with a “nutella” type flavor, my spoon leapt into the hazelnut butter and emerged victoriously to meet the chocolate.  I then saw a quickly dying banana and thought “what a perfect trio!”.   What came out of the oven was the most addicting granola I’ve ever had! 

 chocolate hazelnut banana buckwheat granola cereal

chocolate hazelnut banana buckwheat granola cerealI hate to keep this blog post so short and with no real nutrition information, but baby is calling!  If I’m a bit distant for a while, you’ll know why! However, I have a great idea for my next post that I can’t wait to share with you all, so hopefully I’ll be back soon!

….And without further ado, meet Knox Philip Thorogood …my little nugget as I like to call him 🙂

newborn photography

newborn photography baby feet

newborn photography


SIGNOFF-A


Chocolate Hazelnut + Banana Buckwheat Granola
Write a review
Print
GROCERY LIST
  1. 1 1/2 cups rolled oats (gluten-free if necessary)
  2. 1 1/2 cups buckwheat groats
  3. 2 cups mixed nuts and seeds, nuts lightly crushed* (I used almonds, walnuts, hazelnuts, pistachios, pumpkin seeds and sunflower seeds)
  4. 1/2 cup shredded coconut (optional)
  5. 1 1/2 cups dried fruit (I used cherries and goji berries)
  6. 1/3 cup coconut oil
  7. 1/3 cup hazelnut butter
  8. 1/2 cup maple syrup
  9. 4 1/2 Tablespoons cacao powder
  10. 1 1/2 teaspoon vanilla powder
  11. 3/4 cup smashed bananas (approximately 2 small bananas)
Instructions
  1. Preheat oven to 350 F. Line a baking sheet with parchment paper and set aside.
  2. In a medium bowl, combine oats, buckwheat groats, nuts, seeds, and shredded coconut. Set aside.
  3. In a small saucepan, combine coconut oil, hazelnut butter, maple syrup, cacao powder, and vanilla powder. Bring to a low simmer and stir until all ingredients are combined fully. Remove from the heat and stir in the smashed banana.
  4. Pour the wet ingredients over the dry ingredients and stir thoroughly. Spread the mixture over the parchement paper-lined baking sheet and bake in the oven for 20 minutes. Allow the granola to cool, stir in the dried fruit, and store in an air-tight container.
Notes
  1. *Place the nuts in a ziploc bag and gently crush with a meat tenderizer until they are in chunks.
Love & Garnish — A Nourishing Kitchen https://loveandgarnish.com/
Back to Top|Email|SHARE ON FACEBOOK|SHARE ON TWITTER

Double layer Chocolate Cardamom Cake with Spiced Vanilla Tea & Blood Orange Chocolate Ganache

If you don’t have a soulmate for Valentine’s Day yet, you’ve just found it!  Apologies to my husband, but this decadent and luscious cake is all I need right now to make my heart sing: decadent, creamy, moist, and the perfect combination of spice to chocolate.  Its one of those cakes that you keep going back for more of, slicing off a piece every time you pass by the fridge.  No? Not you? Guess its just me and my pregger chocolate craving then….

Chocolate Cardamom Cake with Blood Orange Chocolate Ganache natural sugar dairy free gluten free

Double layer chocolate cardamom cake with spiced vanilla tea and a blood orange chocolate ganache all natural sugar gluten free dairy free

Last week, I debuted this cake at my brother’s girlfriend’s birthday dinner.  There isn’t a reaction to my cooking I love more  than “Oh my god! This is sooooo good!”.  Especially when I get to tell them, with a sly grin on my face, “Thanks! It’s made with all-natural sugar, coconut milk and whole grain, brown rice flour!”.   My brother is a self-taught chef but has a very different cooking style than me: lots of butter and sugar, not really paying attention to the nutritional value of things (although his cooking is fabulous!).  I knew he would be my toughest critic.  However, he bit into this luscious and dreamy cake and was in shock that it was “healthy”! I just loved it!

Our guest of honour was Anna, my brother’s girlfriend, who took some time living in Israel and has traveled throughout the Middle East.  We have since had many conversations of the flavours of these countries and how we just adore the food from this part of the world (can you say hummus, falafels, rose water sorbet, zaatar, and grilled halloumi?!) .  When I started brainstorming for the birthday cake, I just knew I wanted to pull from these flavours.  If I could have squeezed some orange blossom extract or rose water into this cake, I would have, but I think that would have taken away from the main stars: cardamom, chocolate, and blood oranges.   In some Middle Eastern countries, it is likely you will find the combination of coffee and cardamom brilliantly combined to make an interesting cocktail of sorts.  You can most definitely replace the tea in this recipe with coffee or decaf coffee for a richer flavour and it would turn out fabulous, however, I like the health benefits of the cardamom-anise-vanilla tea used here.   You can also use this recipe and bake the mixture in muffin tins to make individual cupcakes if that works better for you. 

Double Layer Chocolate Cardamom Cake with Blood Orange Chocolate Ganache all natural sugar, dairy free, gluten free

Chocolate Cardamom Cake with Blood Orange Chocolate Ganache natural sugar dairy free gluten free


DREAMY CACAO

Chocolate has been touted as an aphrodisiac and is a Valentines Day staple.  How true this is, I’m not sure.  I think you would probably have to eat a whole lot of this stuff to produce a chemical change in the body and brain.  Chocolate does contain tryptophan that is related to serotonin release in the brain (our “happy” chemical” that is involved in those loving feelings), but again, how much is actually needed to claim it as an aphrodisiac?! Either way, cacao has many health benefits for you and your “lova” which you can find here and it is just plain yummy! By using cocoa powder (which is made from roasting raw cacao) instead of processed, sugar-laden chocolate in this recipe, we retain many nutrients and health benefits we would not normally see with store-bought chocolate.  Also, research has shown, that by combining cacao with dairy, it inhibits the absorption of antioxidants! Crazy, right?! Good thing we used coconut milk in this cake!

Chocolate Cardamom Cake with Blood Orange Chocolate Ganache natural sugar dairy free gluten free


A LITTLE HIATUS FOR “LOVE AND GARNISH”

On another “love” note, I have to sadly say I will be taking some time off from the blog to focus on self-love and getting ready for baby. I have a few weeks to go in this pregnancy, yet so much to do and am feeling a bit overwhelmed at the moment (think spring cleaning x 100 plus a nursery that isn’t finished!).  If I can squeeze in another blog post, I most definitely will, but this could very well be the last time you hear from me for a while (enter sad face!).  Valentines Day is a time to show others we care, but lets never forget to care for ourselves!  

To keep up with my food adventures, baby updates, and culinary experiments, don’t forget to follow me on Instagram!  

Until next time, I leave you with one of the most tasty desserts I’ve ever made! Enjoy!!

SIGNOFF-A


Chocolate Cardamom Cake with Spiced Vanilla Tea & Blood Orange Chocolate Ganache
all-natural sugar, dairy free, gluten free, vegan option
Write a review
Print
GROCERY LIST
Cake
  1. 1 vanilla black tea bag
  2. 1 star anise (optional)
  3. 5 cardamom pods (optional), crushed
  4. 1 ½ cups brown rice flour
  5. ½ cup almond meal/flour
  6. 1 ½ cups coconut sugar
  7. ½ cup unsweetened cacao powder
  8. 2 teaspoons aluminum-free baking powder
  9. 1 teaspoon baking soda
  10. 1 teaspoon sea salt
  11. 1 ½ teaspoons pure vanilla powder
  12. 1 ½ Tablespoons good quality cardamom (or crush your own from green cardamom pods!)
  13. 1 cup full-fat coconut milk
  14. ½ cup coconut oil, melted*
  15. 3 free-range, organic eggs or 3 Tablespoons ground flax seeds soaked in 9 Tablespoons of water
  16. 1 blood orange for garnish, optional
Ganache
  1. 2 cups raw cashews, soaked overnight in pure, filtered water
  2. 1 cup coconut butter, melted*
  3. 1 cup maple syrup
  4. 1 cup coconut milk
  5. 1/2 cup coconut oil, melted*
  6. 1/2 cup unsweetened cacao powder
  7. 1/2 cup + 2 Tablespoons fresh blood orange juice
  8. 2 teaspoons vanilla powder
  9. 1 Tablespoon fresh blood orange zest
Instructions
  1. *Cashews must be soaked the night before
First prepare the ganache
  1. Drain the cashews and rinse with pure, filtered water. Add to a high-speed blender along with coconut butter, maple syrup, coconut milk, coconut oil, cacao powder, orange juice, vanilla powder, and orange zest. Blend on high until combined thoroughly, occasionally scraping down the sides. Once it has reached a uniform consistency, transfer to a bowl and place in the fridge to harden. Allow it to set for at least 90 minutes, or even overnight.
Next, prepare the cake
  1. Preheat the oven to 350.
  2. Place the crushed cardamom pods into a tea bag or ball. Steep one vanilla black tea bag with one star anise and the 5 crushed cardamom pods in 8 oz of boiling water. Let it steep while you prepare the rest of the cake.
  3. With a bit of coconut oil, grease two springform pans or two, 8-inch round baking pans. Cut two circles of parchment paper to the diameter of the pan. Cover the bottom of each pan with a parchment paper circle. Set aside.
  4. In a medium-sized bowl, combine the brown rice flour, almond meal/flour, coconut sugar, cacao powder, baking powder, baking soda, sea salt, vanilla powder and cardamom. Sift the mixture through a sieve to break up the coconut sugar and almond meal clumps.
  5. In a second medium-sized bowl, combine the coconut milk, coconut oil, and eggs. Add the wet ingredients to the dry ingredients and stir gently to combine, being careful not to over-stir.
  6. Remove the tea bag, cardamom bag/ball and star anise from the tea and discard. Add the tea to the cake mixture and stir gently to combine. Pour the mixture evenly between the two pans and place in the oven. Bake at 350 for 35 minutes or until a toothpick inserted into the middle comes out clean. Remove the cakes from the oven and transfer to a cooling rack and allow to cool for at least 30 minutes. Transfer to the fridge until your ready to "frost" the cake.
Assemble the cake
  1. Remove the ganache from the fridge and allow it to sit out until it has softened (approximately 30 minutes); stir vigorously to soften further into a "spreadable" consistency. I like to work with a bit at a time, stirring small amounts as I'm frosting the cake, so it softens nicely. Remove the cakes from the pans and gently peel off the parchment paper. Place one cake on a pedestal or cake plate and spoon half of the ganache onto the top. Spread evenly over the top. Gently place the other cake on top. With a spatula, spread the remaining ganache over the top and sides of the double layer cake. Use a knife to even out the ganache if needed. Garnish with thinly sliced blood oranges and/or more zest if desired.
Notes
  1. The ganache will be quite hard when you take it out of the fridge. Don't worry! After sitting out for a bit and some vigorous stirring, it softens perfectly for "frosting" the cake!
  2. *So as not to dirty extra dishes, I place the coconut oil and coconut butter containers in a boiling pot of water until it has softened, then pour out the required amount.
Adapted from cake portion adapted from Dolly and Oatmeal's chocolate cake
Love & Garnish — A Nourishing Kitchen https://loveandgarnish.com/
Back to Top|Email|SHARE ON FACEBOOK|SHARE ON TWITTER


thai red lentil and roasted cauliflower soup with chile oil

The  aromatic smell of a ginger-lime broth with pan-seared halibut and the sounds of a ping-pong ball being energetically bounced off a table have now quietened.  I’m sitting in a silent home, with only the sound of Harvey snoring to awaken me from this third-trimester stupor.  My brother has just left after a long stay, and I’m already missing his cheery smile and sarcastic quips, and of course all the amazing food he made while he was here.  In the last 5 weeks, I have not only been pampered by my husband, but also by my brother who has been staying with us since Christmas.  (I received a note one day from my brother that read “Do less chores, do more yoga, drink more tea, take more naps, read a book, love you”). The two of them together have barely let me do anything since I’ve become increasingly tired and uncomfortable.  Although, I can’t complain too much; this pregnancy has been quite easy so far.  My biggest obstacle is accepting help and listening to what my body needs, which lately has been rest.  So, with gentle and loving nudges from my brother and husband, I have learned a new word: surrender.   “Surrender”: to relinquish control (haha! SO not easy for me!).  In the past couple of weeks I have learned to surrender to this pregnancy journey and be more accepting of what it requires, allowing others to help in ways I might not always like (I’m a bit of a stubborn, independent gal).  For my brother, this directly translates to food (we’re siblings, what do you expect?!).  Lucky for me, he loves food just as much as I do and was happy to spend most days in the kitchen helping out.

lentil and roasted cauliflower soup with child oil

lentil cauliflower soup with chilli oil

lentil and roasted cauliflower soup with chile ioil

There can be no truer meaning to “nourishing” than a meal that is made with love by someone else.  While my brother was here, he not only helped with chores and made 5-star dinners and breakfasts for me, but lovingly stocked my freezer with meals to nourish my post-baby self.  One of my requests was a lentil soup which drew us both to Ottolenghi’s book “Plenty More”.   There are a million lentil soup recipes out there, but this one really stood out, not only for its simplicity, but its interesting additions such as the aromatic chili oil and vibrant sliced snap peas.  I requested the addition of cauliflower for some extra veggie-lovin, and my brother had the genius idea to roast it first to really deepen the flavour.  What we have here is a dynamite combination of textures, spices, protein, veggies, and love: a nourishing food at its core.

lentil and roasted cauliflower soup with chilli oil

lentil cauliflower soup with chilli oil

Each time I take one of these meals out of the freezer, I’ll think of my brother and the time and care he put into each one of these dishes.  Thank you, brother, for your time, love, patience and support over the past 5 weeks.  We miss you already! 

 SIGNOFF-A


Spiced Red Lentil & Roasted Cauliflower Soup: chile oil, lemongrass, kaffir lime leaves
Serves 6
vegetarian, vegan, gluten free
Write a review
Print
GROCERY LIST
  1. 1 head of cauliflower*
  2. 3 Tablespoons coconut oil, melted
  3. salt and pepper
  4. 4 oz sugar snap peas
  5. 3 Tablespoons coconut oil or sunflower oil
  6. 1 medium onion, thinly sliced
  7. 1 1/2 Tablespoons red curry paste
  8. 2 lemongrass stalks, gently smashed with a rolling pin
  9. 4 fresh kaffir lime leaves, or 12 dried, or fresh lime juice to you taste
  10. 1 1/4 cups red lentils
  11. 1 cup coconut milk
  12. 1 1/2 Tablespoons lime juice
  13. 1 1/2 Tablespoons soy sauce
  14. 1 cup cilantro leaves, coarsely chopped, for garnish
  15. salt
  16. CHILE INFUSED OIL (optional)**
  17. 3/4 cup sunflower oil
  18. 2 shallots, coarsely chopped
  19. 1 clove garlic, coarsely chopped
  20. 1 teaspoon peeled and coarsely chopped fresh ginger
  21. 1/2 red chile, coarsely chopped
  22. 1/2 star anise pod
  23. 2 teaspoons curry powder
  24. 1 teaspoon tomato paste
  25. grated zest of 1/2 small lemon
Roast the cauliflower
  1. Preheat the oven to 425 F. Chop the cauliflower into bite-size pieces and place on a parchment paper lined baking sheet. Drizzle with the coconut oil and season with salt and pepper. Roast at 425 F for 15-20 minutes (depending on the size of your cauliflower chunks) or until they are soft.
While the cauliflower roasts, prepare the chile oil (optional)
  1. Heat 2 tablespoons of the sunflower oil in a small saucepan. Add the shallot, garlic, ginger, chile, star anise, and curry powder; fry over low heat for 5 minutes, stirring from time to time, until the shallot is soft. Add the tomato paste and cook gently for 2 minutes. Stir in the remaining oil and lemon zest and simmer very gently for 30 minutes. Leave to cool and then strain through a cheesecloth-lined sieve. Set aside.
Prepare the soup
  1. Bring a small pan of water to a boil and throw in the sugar snap peas. Cook for 90 seconds, drink, refresh under cold water, and set aside to dry. Once cool, cut them ion the diagonal into slices.
  2. Heat the sunflower oil in a large pot and add the onion. Cook over low heat for 10-15 minutes, stirring once or twice, until the onion is completely soft and sweet. Stir in the red curry paste and cook for 1 minute. Add the lemongrass, lime leaves, red lentils and 3 cups of water. Bring to a boil, turn down the heat to low, and simmer for 15 minutes, until the lentils are completely soft.
  3. Remove the soup from the heat and take out and discard the lemongrass and lime leaves. Use a blender or hand immersion blender to process the soup until it is completely smooth. Add the cauliflower, coconut milk, lime juice, soy sauce, and 1/2 teaspoon salt and stir. Return the soup to pot and bring to a simmer. Once heated through, serve immediately and garnish with the snap peas and cilantro. Finish with a drizzle of the chile oil.
Notes
  1. *The chile oil is a bit time consuming but adds such a nice touch! If you end up making it, I suggest roasting a bit of the cauliflower with the chile oil to really amp up the flavour!
  2. **This will make more than you need for the soup, however, it will keep in an air-tight container in the fridge for up to a month. Use on any roasted vegetables, fish, soups, grilled dishes, salads, etc.
Adapted from Ottolenghi's "Plenty More"
Love & Garnish — A Nourishing Kitchen https://loveandgarnish.com/

PS

A special thanks to my amazingly talented friend Kelli Ireland of LookTwice Photography for taking some maternity photos of me this week and making this pregger feel a bit more pampered! I am so lucky to have these memories documented in such a beautiful way! 35 weeks and counting!!!!

maternity photography by LookTwice Photography in Calgary

maternity photography natural light by LookTwice Photography Kelli Ireland Calgary

maternity photography natural light by LookTwice Photography Calgary


  • Crystal - I miss James already too! This looks great I was planning on making a Thai dish this weekend, looks like I found one.ReplyCancel

Back to Top|Email|SHARE ON FACEBOOK|SHARE ON TWITTER

gluten-freevegetariannatural-sweet


branch2

Maple Squash & Homemade Ricotta Sandwich with Arugula & Truffle OilSometimes its refreshing to explore someone else’s food creations.  No thinking, just following a recipe, measuring, mixing, baking, and out comes a perfectly baked cake or a tested and true kitchen staple.  I decided to go this route for a recent food photography workshop I took with the very talented Christie Graham: an easy,  go-to sandwich I have been addicted to lately with the addition of Ashley Rodriguez’s homemade ricotta, as well the “Grapefruit and Olive Oil Cake with Bittersweet Chocolate” from Ashley’s new cookbook “Date Night In”.  I have been craving grapefruit recently, so this choice seemed like a no-brainer. 

 Maple Squash and Homemade Ricotta Cheese Sandwich with arugula and truffle oil

Maple Squash and Homemade Ricotta Sandwich with Arugula and Truffle Oil

Date Night In

grapefruit and olive oil cakes with bittersweet chocolate from "Date Night In"

I finally received my very own copy of Ashley’s “Date Night In” a week ago and feverishly opened the package to find this beautiful blue cookbook, chock full of recipes, stories, sentiment, and Ashley’s time and love over the past few years.  I was so excited to dive right in; I even tagged numerous pages to come back to!  May I just say, “Well done, Ashley”! I met Ashley and her husband last year and Ashley has become somewhat of a mentor to me.  I was so proud and excited to get this cookbook and read a bit more into their life, their date nights, and the food that brings them together week after week.  As the workshop date approached, I knew I had to try and do “Date Night In” a bit of justice.  

The one-on-one workshop was eye-opening; I was so grateful for this time with Christie! I was in shock that this very talented photographer was only 25 and had been photographing for over 10 years! The little touches she brought to the workshop made all the difference: various goodies like a custom-made camera strap and lots of tips specifically compiled for “Love & Garnish”.  The morning flew by as we chatted all things photography and business, sipped tea, collaborated on food styling, practiced photography, and devoured our squash and ricotta sandwiches! 

Christie Graham Food Photography Workshop

Our model for the day was a simple sandwich of maple roasted squash, homemade, creamy ricotta, and crisp, peppery arugula, drizzled with the distinct, rich flavor of truffle oil.  Why have I never made my own ricotta cheese before?! Its so amazingly simple and so gratifying!  Christie and I shot our sandwich, eagerly awaiting the moment when we could dive in, taking huge bites out of the soft, fresh chia bun in order to garner a few “process” shots.   In reality, we were starving and couldn’t wait to dive into this sandwich! I think I have eaten this 4 times in the last 10 days; its so simple, yet so complex with the various textures and flavours….I’m in love! 

Maple Squash & Homemade Ricotta Sandwich with Arugula and Truffle OilHomemade Ricotta and Chives details

Maple Squash and Homemade Ricotta Sandwich with Arugula and Truffle Oil

We ran out of time to photograph the grapefruit and olive oil cakes, but I was so excited to put into practice the things I had learned in the workshop, that I took some time a few days later to photograph them on my own.  They were so delicious it was hard not to eat them while photographing!  The grapefruit was subtle yet essential for the unique flavor of the cake.   If I were you, I would buy Ashley’s cookbook just for this one recipe!  

Date Night In grapefruit and olive oil cakes with bittersweet chocolate

Date Night In Cookbook: Grapefruit and Olive Oil Cake with Bittersweet ChocolateDate Night In: Grapefruit and Olive Oil CAke with Bittersweet Chocolate

Until you receive your copy of “Date Night In”, I hope you enjoy my sandwich with Ashely’s ricotta; even if your a meat-eater, you’ll want to make this one over and over again! 

homemade ricotta[LAST PHOTO BY CHRISTIE GRAHAM PHOTOGRAPHY]

SIGNOFF-A


Maple Squash & Homemade Ricotta Sandwich: arugula, chives, & truffle oil
Serves 4
Write a review
Print
GROCERY LIST
Ricotta Cheese*
  1. (or use organic, store-bought)
  2. 4 cups organic whole milk
  3. 2 cups organic heavy cream
  4. 3 Tablespoons fresh squeezed lemon juice
  5. 1/2 teaspoon sea salt
  6. 4 Tablespoons fresh chopped chives
Squash
  1. 1 small butternut squash, peeled and sliced into chunks
  2. 2 Tablespoons coconut oil, melted
  3. 3 Tablespoons maple syrup
  4. 6 sage leaves
  5. salt and pepper to taste
Sandwiches
  1. 2 Tablespoons extra virgin olive oil
  2. 1-2 Tablespoons white truffle oil
  3. 1 1/2 cups arugula
  4. 4 whole grain buns of your choice
DIRECTIONS
  1. Preheat oven to 375 F.
Prepare the ricotta cheese
  1. Line a sieve or colander with two layers of cheesecloth and set it over a large bowl.
  2. In a large, heavy saucepan, combine the milk and cream and set over medium heat. Warm the milk and cream just to a gentle boil and then turn off the heat. Add the lemon juice and give the while pot a soft stir. Curds will begin to form immediately, so you don't want to disturb them too much with stirring.
  3. Let the pot sit undisturbed for 1 to 2 minutes. At this point, you should see the curds and whey separating. Gently pour the mixture onto the sieve and allow the whey to drain until the ricotta has reached the consistency you like. This usually takes about 20 minutes.
  4. Place the ricotta in a bowl and stir in the salt and chives. Place in the fridge. It will keep for up to 1 week in the fridge.
Prepare the squash
  1. Mix together the coconut oil, maple syrup, and sage leaves. Crush the sage leaves into the oil and syrup mixture a bit to release the flavour. Toss the squash pieces with the oil and syrup mixture, arrange in a single layer on a baking sheet, and season lightly with salt and pepper. Cover with parchment paper and bake at 375 for 30 minutes. Check for doneness and continue cooking for another 10 minutes, depending on the size of your squash pieces. Set aside.
Arrange the sandwiches
  1. In a small bowl, mix together the extra virgin olive oil and 1 Tablespoon of the truffle oil. I prefer more truffle oil, but start with 1 Tablespoon, taste the mixture, then add more if you prefer. Layer the buns with the ricotta cheese, butternut squash, and arugula; drizzle with the truffle oil. Enjoy!
Notes
  1. *Recipe from "Date Night In" by Ashley Rodriguez: Yields 2 1/2 cups
Love & Garnish — A Nourishing Kitchen https://loveandgarnish.com/
  • Brooke @ Chocolate & Marrow - I just got my copy of DNI this week, too! I’m still trying to decide which recipe to do for the blog, but I’m leaning towards a cake 😉

    Also, these sandwiches look amazing! Homemade ricotta is one of my favorite things to cook on lazy weekends. I’ll have to give these a try soon!ReplyCancel

    • Love & Garnish - It was a toss up for me between some of her Italian recipes and the Kale with prosciutto dressing! So many good ones!! Maybe one day you and I will have cookbooks and we’ll be cooking from each others book!ReplyCancel

  • Ashley - As soon as I saw your sandwich, I knew I wanted to make it this weekend. The photos are beautiful, very well done. I actually found your blog by following Christie’s instagram and I’m so glad I did!ReplyCancel

  • Christine Pienaar - Anise, these images are amazing! The food looks so delicious.ReplyCancel

Back to Top|Email|SHARE ON FACEBOOK|SHARE ON TWITTER

vegandairy-freegluten-freevegetarian


branch2

sweet squash and shiitake quinoa pilaf - detox food

To say I’m obsessed with Neal’s Yard Remedies “Rose Balm” is an understatement.  Where has this company been all my life?! Neal’s Yard Remedies is a British company that recently opened stores throughout Canada; Calgary being one of the lucky cities to gain its presence.  They use all natural and organic ingredients, harvesting some of the herbs themselves.  And the fact that the products are certified ‘ethically sourced’ is even better.  I recently attended one of their skin workshops and I knew I had found a gem when their first recommendation for radiant skin was cleaning up your gut…before buying any of their products! Amen, Neal’s Yard Remedies! They obviously care about the internal health of the individual and believe this 100% contributes to the health of your skin. 

So, when I was asked by Orsha of Neurotrition to team up with her innovative Neuroscience/Nutrition company, as well as Neal’s Yard Remedies for a detox workshop, I jumped right on board! Teaming up with  two companies that believe so wholly in holistic health for each of their clients was an easy choice.  

The recipe I’m sharing with you today was one that used the liver-loving, detox-friendly foods from the workshop.  This is a great recipe for a liver cleanse or even just an everyday, delicious meal! There is a big misconception that cleanse and detox food is bland and boring…but I disagree! Each ingredient in this dish was carefully chosen to enhance detoxification pathways in the liver.   And although it sounds scientific and complicated, the actual recipe is anything but!  If your not on a detox, don’t let that deter you from trying this recipe. I would substitute 1/2 cup of the water with 1/2 cup of mirin if you aren’t on a liver detox….then make a big batch and eat away!

detox food turmeric green onions

sweet squash and shiitake quinoa pilaf - detox food

DETOXIFICATION

As I mentioned in my previous post, a lot of people jump right into drastic and severe detoxes in the New Year: juice cleanses, harsh boxed cleanses, etc.  While cleaning up our act is a great idea after a bit of an indulgent December, the most beneficial thing you can do is ease into it.  Prepare for the cleanse by increasing your fresh fruits and veggies, gluten-free whole grains, legumes/beans, healthy fats such as nuts and seeds, and fermented foods and/or taking probiotics.  And don’t forget plenty of pure, filtered, lemon water! When you are ready to begin your cleanse, your body will be a bit stronger to attack all the toxins that will be released during a cleanse.  By supplying water, fiber, and probiotics, our digestion will also be ready to properly eliminate those toxins, so as not to continue circulating them in your system.  It is very important to choose a detox protocol that fits your current diet and lifestyle, because if toxins are released too quickly, the detox will make you sick and stress your organs of elimination.  The best “detox” or “cleanse” to take part in, is one that fits you best, which may just be an organic, whole-food diet; pills are never needed to detox properly.

WHY DETOX THE LIVER?

The liver is responsible for over 500 processes in the body, including filtering the blood, neutralizing harmful substances, regulating hormones, building proteins, and making bile to break down fats, to name a few.  Substances your body deems as toxic and must be excreted include caffeine, sugar, alcohol, drugs, chemicals and unnatural additives in processed and refined foods, pesticides, and preservatives.  When the liver is overburdened with these toxins, its other 499 jobs are compromised, causing damage to bodily tissues.  

In order to detoxify the liver naturally, certain foods have been proven to enhance detoxification pathways in the liver and protect the liver from further damage.  Neurotrition’s detox workshop focused on these foods and have been included in my recipe.   

detox foods


Cruciferous vegetables: kale & collards

Cruciferous vegetables are touted as the king of liver-loving foods.  They include cabbage, cauliflower, broccoli, Brussels sprouts, collard greens, mustard greens, kohlrabi, turnips, rutabaga, watercress, radish, and kale.  These foods have been proven to regulate stage 1 of liver detoxification while supporting stage 2, thus enhancing detoxification pathways in the liver. 

Probiotic & Prebiotic foods: garlic & onion

Prebiotics act as food for probiotics, which enhance our gut health and immunity.  As we detox, toxins are released, so immunity needs to be strong enough to handle the released toxins.  Probiotics, such as kombucha, miso, kimchi, sauerkraut and my fermented carrots, also help cleanse liver cells.  Prebiotics include foods such as asparagus, chicory root, burdock root, garlic, onion, beets, wheat bran, and jerusalem artichoke, two of which are found in this recipe.

Garlic also contains a high amount of allicin and selenium: two natural compounds that aid in liver cleansing.

Other liver-loving vegetables: shiitake mushrooms, kombu seaweed

Due to where they grow, sea vegetables such as kombu seaweed, contain a very high mineral content.  A study from McGill University found that seaweed contains a compound called “algin” which absorbs toxins, such as radioactive particles, and chelates heavy metals from our system. 

Medicinal mushrooms, like shiitake mushrooms, are not only adaptogens, helping to bring homeostasis to the body, but they are immune modulators that also protect the liver from further damage.  A study in 2006 found that shiitake mushrooms protect liver cells from damage and strengthens the liver’s ability to detoxify.

Fiber: squash, quinoa, and various vegetables

Fiber helps cleanse the mucus along the small intestine, creates bulk in the colon and pull toxins from the gastrointestinal tract. 

*We want to stay away from gluten during cleanses and detoxes because gluten is a common allergen.  If someone has an unknown gluten sensitivity or intolerance, eating it could disrupt digestion, making it harder for the body to excrete the toxins. 

Healthy fats: pumpkin seeds

Omega 3 fats, such as those found in pumpkin seeds, hemp seeds, flax seeds, and wild salmon, have been shown to have protective effects on the liver.  Nuts and seeds are an easy addition because you can sprinkle them on anything!

Spices: cumin, turmeric, ginger, garlic

Toxins are stored in fat cells, so stage 2 of liver detoxification is turning the fat-soluble toxins into water-soluble substances so they can be easily excreted by the body.  Turmeric helps stimulate this stage of detoxification. 

Antioxidants: vitamins A, C, E, selenium and zinc; present in most vegetables, nuts and grains.

Antioxidants protect the body from free radical damage from the free radicals released during stage 1 of detoxification.  As the toxins are converted to less harmful substances, free radicals are released, which can cause damage to bodily tissues if there are not enough antioxidants to combat them.

Lifestyle

Other than including these liver-loving foods into your diet, lifestyle changes such as dry brushing, light exercise, meditation, massage, and epsom salt baths can support a liver detox by enhancing toxin removal and stress relief.  Detoxes are the perfect time to slow down, be present, and perhaps reflect on our own lives as well.  My friend just began a beautiful bog: Kori Leigh: Cultivate Wellness.  I encourage you to check it out to enhance your cleansing thoughts or even just for some day-to-day inspiration.  Her thoughts are not only beautiful and inspirational but reflective and grounding.  


As you can see, this recipe is jam-packed with liver-loving foods! So put down that glass of wine (sorry to be the bearer of bad news!), and give your liver a little pick-me up with this delicious pilaf….maybe even serve it with kombucha for some probiotics!  


SIGNOFF-A


Sweet Squash & Shiitake Quinoa Pilaf: turmeric, ginger, garlic
Serves 2
Write a review
Print
Prep Time
15 min
Cook Time
20 min
Total Time
35 min
Prep Time
15 min
Cook Time
20 min
Total Time
35 min
GROCERY LIST
  1. ¾ c quinoa, rinsed thoroughly
  2. 1 cup squash (I used butternut), cut into cubes
  3. 1 ½ cup pure, filtered water*
  4. 1 Tablespoon fresh garlic, minced
  5. ½ cup chopped yellow onion
  6. ¾ cup shiitake mushrooms, rinsed
  7. 1 teaspoon turmeric
  8. ¼ teaspoon cumin
  9. 1/2 teaspoon fresh ginger, minced
  10. ½ teaspoon sea salt
  11. 1 piece of dried kombu seaweed, crumbled
  12. 1 ½ cups roughly chopped kale or collards
  13. 2 Tablespoons soaked, raw, pumpkin seeds
  14. 1 green onion, sliced
Instructions
  1. 1. In a medium saucepan, combine quinoa, squash, water, garlic, onion, mushrooms, turmeric, cumin, ginger, salt and kombu. Bring to a boil, cover, reduce to a simmer and cook for 20 minutes. Check after 15 minutes and ensure there is enough water and the quinoa isn’t sticking to the bottom. Add a bit more water if needed.
  2. 2. Add the chopped greens and return the lid to the pot, letting the greens steam for a few minutes.
  3. 3. Divide into bowls and top with pumpkin seeds and green onions.
Notes
  1. *If your not on a liver cleanse, replace 1/2 cup of the water with 1/2 cup of mirin - its a great addition!
Love & Garnish — A Nourishing Kitchen https://loveandgarnish.com/
  • Naomi - I will be trying this recipe this weekend. Looks like another hit Anise!
    Ditto on the Neal’s Yard wild rose balm! Amazing stuff. Just a tip for the old people reading the post (like me)…the frankincense serum has worked WONDERS! Just discovered it over Christmas when I was home. They need to open a location here in Houston!ReplyCancel

    • Love & Garnish - I’ve never tried that but heard great things!! Let me know how the cooking goes! I just LOVE this with the mirin!ReplyCancel

  • Millie | Add A Little - This looks so delicious Anise! I love the vibrant colour too!ReplyCancel

  • Tilly - Neals yard remedies are gorgeous and our beautician here in little builth wells sells them! Nanny likes them ……….ReplyCancel

    • Love & Garnish - I can see that 🙂 Beautiful products…right up Nan’s alley! Hope all is well across the pond!ReplyCancel

  • Sue - I enjoyed your site, lots of great ideas with a passion for food and wellness.ReplyCancel

Back to Top|Email|SHARE ON FACEBOOK|SHARE ON TWITTER